Want to check out our tractor maintenance videos? Click here to see what we've got!
A common problem with the hydraulic lift on the Massey Ferguson 165 is when the lift arms begin to judder. Common symptoms are the need for high engine revs to get the tractor to lift and the normally smooth action of the lift arms becomes a shake or judder. This shaking occurs both when the lift arms are raising and also when the lift arms are held at any point by the position control. Jewel has this problem with his tractor…
You have a very interesting web site on these tractors, I am having problems with the hydraulic three point lift. Within the last 20 hours of use, the implements have began jumping up and down when carrying also using high rpm’s to clear the ground with implement.. I have done most of my own repairs but on this one I’ll need direction. I not trying to tell you what is wrong but merely the things I have tried so far. Checked the fluid ( hyd.,trans., and final drive seem to use the same reservoir) Hydraulics acting like it’s starving for fluid?
With or without implement the lift arms jump. To lift implement off ground RPM’s must be above 1500. Pressure gauge test: gauge jumps from 1500psi to 1800psi at 2000rpm’s with both quadrant levers in up position.
Thank You for any advise.
Jewel Watts
Hi Jewel,
It sounds like you have one or more of your pump cylinders pulsating. This is most likely due to a broken ring or a stuck valve. When one of the cylinders is not pumping efficiently it gives the symptoms of the linkage juddering up and down. Obviously this reduces the overall pressure in the system and hence your pressure guage reading of 1500 – 1800psi. The pressure in the system should be somewhere between 2100 – 2400psi.
You will need to remove the top cover, access the pump and then strip it to
find the problem.You do not need to split the tractor to access the hydraulic pump. It only
takes about 40 minutes to remove the pump. Here’s what you need to do….Drain oil.
Remove seat. (we want to remove the top cover, which is the large piece
under the seat that bolts to the transmission housing and has the lift arms
connected to it.Remove the circular plate (side cover) on right hand side of tractor that
has the dipstick in it.Remove any external hydraulic pipes from underneath the seat.
Remove ‘cap’ (2 studs) from front right hand side of top cover. There will
be a stand pipe underneath it, which may withdraw with the cap.Disconnect lift arms.
Undo all bolts that hold top cover down (note where they come from as they
are all different lengths).You will now need 2 people to lift the top cover off (or a pulley, engine
hoist etc.) as it is heavy.Look inside the tractor and the first thing you can see is the drive shaft
which powers the rear wheels. Remove the split pin, slide back the collar
and then this shaft can be removed.Next you need to remove the dowels which prevent the pump from rotating.
These are bolted through either side of the transmission housing (2 studs in
each one).Next remove pto shaft. There are 3 bolts to undo at back of tractor and
then give the shaft a sharp pull to remove it.Move the pto lever into the ground speed position and then the pump will
simply lift out.That’s it the pump is now out.
Obviously you should check the filter (and probably replace it) and o’rings within the system. A leaking o’ring, split in the stand pipe, worn/scratched lift cylinder etc. would cause a reduction in pressure, but the juddering symptoms strongly suggest a problem with one of the two pistons/valves in the pump which would mean that only 50% of the pump is working at full pressure.
Hope that helps with your diagnosis.
Steve
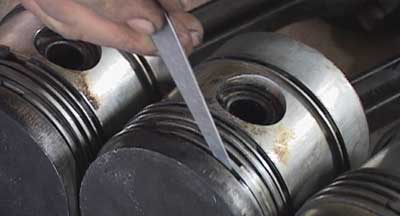
Drained fluid down just below right side ( dipstick cover) opening, ran tractor thru positions, No leaks were evident, removed top cover (valve body), filter is clean, 1st pic shows the peices found in the bottom of case( the 2 pieces on the right are very small, if size is necessary I can mike, I would say 5/16? at base with taper upward and 1/16? hole thru center) , 2nd pic shows some type of arm, which I have no idea if anything attaches to it.
When you lift the top cover then the components will ‘fall to bits’. There should also be a tiny little spindle which fits through the two little cone shaped rollers.
The control valve actuating lever attaches to the control valve with a spindle through those two little cone shaped rollers. Therefore these ‘loose’ components you have found are not the cause of your problem, but fall of each time the top cover is taken off (and difficult to put back on!).
I still thinks it will be one (or more) of the valves in the pump that is causing your problem. Or (less likely) one of the piston rings. So keep on taking the pump out and have a look at it.
Comments……
1
ivo solleder says:June 29th, 2008 at 12:06 am
hi, im about to undertake the removal of a hydraulic pump on an early mf35. i have seen lots of pictures and explaniations, but am stuck on disconection of the lever arms.
can i lift the top of the housing off or is there an extra step somewhere.
thank you for any help.ivo
2
The Vintage Tractor Engineer says:June 30th, 2008 at 3:14 pm
Hi Ivo,The hydraulic top cover should just lift straight off. It is easier if you take the little cap off and remove the stand pipe first. If you take the side cover plate off the transmission housing before removing the top cover you can see the arrangement of the levers, for when you come to putting it back together.
The top cover is heavy so it will need 2 people to lift it.
Our hydraulics DVD that will be released in a few weeks time will show you everything you need to know.
Steve
3
Ty Tower says:August 15th, 2008 at 8:01 pm
This is a good description of the stripdown.
The book says for a Selectamatic you have to break the tractor in two. Not so in the 175.
Used the above and then removed auxilliary connections including the one pipe to the front. 11/16ths short(6?) spanner it was . Then moved pump a bit to remove three bolts holding the auxilliary pump.1/2 ” they were.I still found it impossible to get the pump out so I removed the PTO selector gear and the Oil Filter base and away it came.
4
Ty Tower says:August 25th, 2008 at 7:51 pm
On replacement of the pump I found I had to have the bits off as above, except for the oil strainer base piece.I did have some difficulty with the Selectamatic nut but by guiding it a bit at the last point then putting the pins in, right side then left, it started on the thread by hand and I could then tighten it properly. I can see though that you should have the tractor in a position where you are prepared to break it open if you can’t get this nut restarted.I was able to hone the cylinders with a brake cylinder hone for the new rings.
On my Mark 2 pump the pistons could go in two ways and the sides of the square box they are part of has champhered edges on one side . Mine has gone in with the champhers facing the same way but I suspect they should both face either outwards or in . Could someone have a look when they remove one and post here please or does anybody know which is the right way and why ?
5
Ty Tower says:August 26th, 2008 at 5:17 am
Probably here is as good a spot as any for this post but if it needs moving please do so.OIL RECOVERY
My oil had water through it and after 2 weeks standing it had not separated back out.I cut the bottom from a 44 gallon drum and sat it on bricks with a small fire under . I carefully boiled the bad oil and stirred initially for about 10 minutes until the oil started to boil then let it continue for at most an hour. The water boiled off and the oil was perfect for reuse.
You will get all the wowsers telling you not to do so but as long as you are aware of these three things you should be right.
1/Position the drum so that if it caught fire it could continue to burn out without doing any harm.
2/Once the moisture starts to boil off keep the fire small to moderate ,do not overheat as if the oil vapour should ignite it will only do so when it gets up to flash point and you should be nowhere near that.
3/If you get a fire up of the oil do not try to douse it with water as you get a massive flare up . See water on oil fires on UTube.
Use common sense re safety of all around you and the reward is beautiful dark oil reuseable and a lot less oil wasted poluting the earth.


i have a mf 265 tractor.it had a lifter problem either sticking on the top position or when its on the ground,it cant rise the arms even without fitting impliment.please help as i have been replacing pumps and times the kits but still the problem exists.
Please help, i have an MF440 tractor, i just replaced the hydraulic cylinder & piston assembly which comes on the top cover but now the hydraulics is failing to lift implement and making a noise like it is oil starving. Cleaned the strainer, changed the oil & filter and tried changing the pump valve but to no avail, what should i do next?
I have a mf 230 tractor. The hydraulics are really weak when full revs it only goes to 90psi and at idle it is only 30psi and the lift arms wont lift. Pump looks alright I have changed the filter and oil it did have 90 oil in it but we have changed it to 10/40 as per manual. We had the same issue when the oil was 90.please help with some suggestions.
hi all, i have an old massey 165 with a unusual problem with the hydraulics. i’ve had the oil in the back end replaced with universal oil. the pump was taken out and had a repair kit put into it as well as filter replaced. the problem is sometimes [most of the time]it is slow to tip a trailer. sometimes it works fine and the next day its very slow. i’ve tested the pressure and it’s pumping out at 2500psi. its like the pressure is good but the oil flow is poor. one person suggested that maybe air is getting into the system via the filter which had to be pared with a stanley blade to be fitted or an o ring on the stand pipe.now the pump repair kit was hard to get as it seemed to be more of a mf 65 than a 165 hensce the filter was not the proper one we got. any help on how to solve the flow problem would be greatly appreciated.. thanks
Hi Roger,
If the arms are stuck in the up position that usually points to a jammed control valve in the pump. Usually either dirt in the system or a damaged control valve spring. I think you will need to at least take a look through the side cover to see what is happeneing with the control valve (SAFETY FIRST – DO NOT PUT YOUR HANDS INSIDE WHILST TRACTOR IS RUNNING). If the problem requires remedial action then you would need to access the pump.
Steve
i have problems with my 175 massey ferguson & need some answers if possible #1 the lift arms stuck in up position after two days it leaked down but now it wont lift
my Massey 165 lift arms not responding right when i go to lift a plough it does not respond right away some times i have to put in gear and it lifts but takes a while to do so then when i what to lower the lift arms it drops down very fast is it my Hydraulic Lift Cylinder or what and there’s a knocking noise when i lift the arms up too high
hello have massey furgusen 165 have 2300 pounds but bucket is supper slow were is set screw to speed up lift buck rolls quick just slow up and down and pumps good put tester on it
I have a 165 and the tpl will not lift at all and if I have them lifted by another means, they drop slowly, do the pump seals need replacing? According to the above, the access and removal to the pump although fiddley should be easy!
regards Barry
Thanks for your kind time and effort in helping me fix the problem. I have work to do and don’t want to run the tractor with this bad knocking sound.
Joe
my 1980 240 developed a loud knock in the drive train after letting the tractor idle for about 30 minutes on a steep incline. What is the problem, a hudraulic pump?
I hav a massey 165 and was lifting a heavy object wen I went to lift again it will not bucket is now on the ground and wen I try to lift now nothing happens, I removed one of the hyd lines to the lift circuit and tryed to lift no hyd fluid comes out so maybe main relief valve broken ?? Plz help im not sure ?
j ai desacoupler mon 165 pour une reparation de brake et transmission apres remontage ya plus d hydraulique ne marche plus et la prise de pouvoir fonctionne elle quoi le probleme merci a l avnce
SOUNDS TO ME LIKE YOUR HYDRO. PUMP HAS WENT OUT I HAVE A 135 AND A 165 AND HAVE HAD THE SAME PROBLEMS WITH THEM
hello i have a mf165 diesel and my hydro. are weak will only lift about 1200 lbs on rear and my front end loader is very slow on lifting can you tell me if i have to break my tractor apart to take the hydro pump out and if so any suggestions money is tight so ill be doing this myself so any advice will be greatly apperciated
I have an old (maybe mid-60s) Massey 135. I have lost all hydraulics, including the power steering. Is the steering utilizing the same pump as the three point hitch and front bucket, or is this just a weird coincidence? The hydraulics had gotten very very slow with a very slight shudder when lifting (empty bucket), then one day – nothing. Neither the blade , or bucket will lift off the ground and the power steering is non-existent. Any chance that the problem could be a clogged hydraulic filter? Any idea where I mightr find this filter? Thanks in advance
Can someone help me plz. I have a massey 165 and the hydraulic pump is weak. Went to order one on line and found 2 different ones for it so far. Any idea how many pumps they made for it. its a 1972 massey 165 with multi power.
thank you
hello,
my 165 multipower has started to drop hydrolic arms at full throtle?
it has the pressure hydrolics system with the indentpent PTO and second hydrolics pump.
how can i fix this??
thanks
Diane xx
Im thinking of buying a MF 165. Would someone give me an allround veiw of this tractor.I think I like what I read about it.
how much maximum load does a 165 tractor really lift?
well i have a lot of questions regarding the hydraulics on a 165 so here goes.
what is the ‘draft’ lever for??
the lift lever should be positioned where to have the lift fully raised?
what is the high and low pressure area on the slider used for?? and should the lever ever be in this zone to simply lift an implement??
and finally is the lift cylinder itself ever the cause of poor lift capacity and ‘hopping’ or is it more likely the pump??
i have a 165 mf and recently fited a mf pipe loader but have trouble lifting a round bale i recently replaced the hyd filter suspect the pump is worn out can i fix it myself
I have a 175 diesel, am I understanding right you can remove auxillary pump without splitting the tractor?
I am currently reading 1000psi on main pump and bumping 50 psi on auxillary. I am currently starting on removing both pumps to either rebuild or replace. I have ordered your dvd to assist on rebuilding the main pump. If I do not have to split the tractor that would be great for I have a front end loader and it would be a huge job removing it.
If you have any advice that would be great.
The pressure reading was taken from the plug located below the cover and the auxillary was taken from the quick disconnects. The bucket works but is very slow with little lifting power.
Thanks,
Ronnie